20min Buttery Jam Thumbprint Cookies
Most thumbprint cookie recipes fail because the dough cracks during shaping, requires hours of chilling, or flattens into sad, sugary discs in the oven. We fix every one of these problems by swapping granulated sugar for powdered sugar and using softened butter. The starch in powdered sugar anchors the butter fat, giving you a pliable, rollable dough that goes straight into the oven without chilling. You get round, tender cookies with glowing jam centers in just 20 minutes from start to finish.
What Makes This 20-Minute Version Work
Traditional shortbread thumbprints rely on long chilling periods to harden butter fat so the cookies hold their shape. When you skip chilling with standard recipes, the high proportion of melting fat causes the dough walls to collapse. We skip the waiting time entirely by altering how the fat and dry ingredients interact in the bowl.
Powdered sugar contains roughly three percent cornstarch by weight. When beaten with room-temperature butter, that fine starch absorbs free liquid immediately and builds an internal structure that holds up under oven heat. This prevents the cookies from spreading across the baking sheet while eliminating the need for an hour-long rest in the refrigerator.
Using softened butter rather than cold butter creates a soft, clay-like dough. Cold butter forces you to knead harder to press the dough into balls, which develops gluten and makes the cookies tough and prone to cracking when you press your thumb down. Softened butter combines quickly with minimal handling, preserving a tender crumb and smooth edges.
Ingredient Notes and Trade-Offs
With only seven basic ingredients, each component plays a precise structural or flavor role in this recipe.
- Unsalted Butter: Use real block butter with at least 80 percent butterfat. Soften it until a finger leaves a clear indent without sliding through liquid fat. If you only have salted butter, omit the added salt in the recipe, though your cookies may taste slightly more savory.
- Confectioners’ Sugar: The fine texture melts seamlessly into the butter without leaving grainy sugar crystals. Do not substitute regular granulated sugar one-for-one; granulated sugar melts too fast in the oven and will cause the cookies to spread flat.
- All-Purpose Flour: Standard bleached or unbleached flour provides the right protein content (10 to 11 percent) to hold the cookie’s wall structure. A 1-to-1 gluten-free baking flour blend containing xanthan gum works well as a direct substitute.
- Pure Vanilla and Almond Extracts: Pure vanilla extract provides a warm base flavor, while a small touch of almond extract gives these cookies a classic bakery profile. You can substitute lemon extract or fresh orange zest if you prefer a bright citrus note.
- Thick Seedless Jam or Preserves: Use high-pectin, thick seedless jam such as raspberry, strawberry, or apricot. Avoid low-sugar jams or thin fruit jellies because their high water content will boil over the rim and scorch on the baking sheet.
Step-by-Step Doneness Cues and Timing
Watch for these visual and physical cues during prep and baking to guarantee the perfect texture every time.
- Creaming the Fat and Sugar: Beat the softened butter and powdered sugar for a full two minutes on medium speed. The mixture should look pale, smooth, and fluffy, with no visible streaks of unmixed sugar.
- Mixing the Dough: Stir in the flour on low speed just until the dry white streaks vanish. The dough should come together into a soft ball that pulls cleanly away from the sides of the mixing bowl. It should feel like fresh modeling clay and leave no sticky residue on your fingers.
- Forming the Indentations: Roll 1-tablespoon portions of dough into tight, smooth balls between your palms. Press down gently with your thumb or the back of a round 1/2 teaspoon measuring spoon. If small cracks appear around the rim, gently smooth them with a moist fingertip before adding jam.
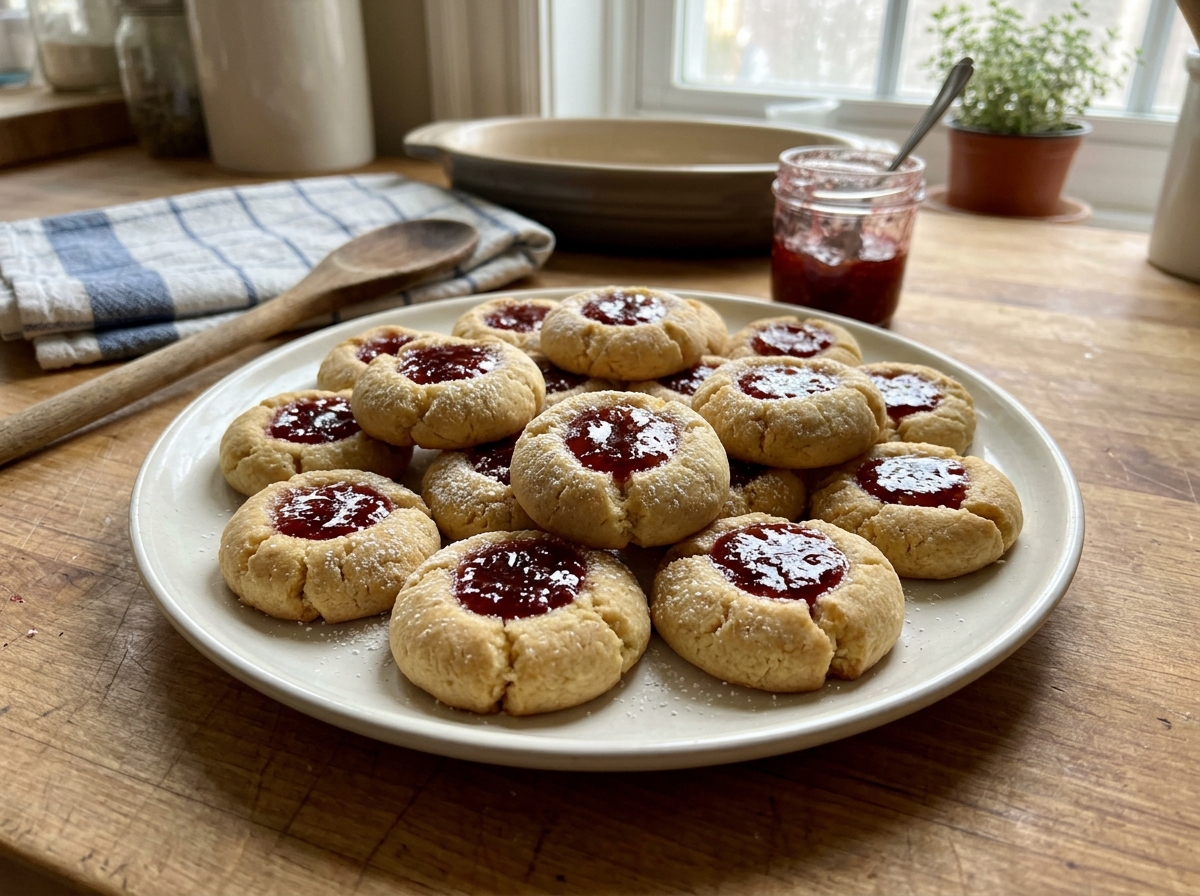
- Baking Doneness Cues: Bake at 350°F (175°C) for 10 to 12 minutes. The tops of the cookies should remain pale and matte, while the bottoms turn a light golden color. The jam center will show tiny, slow-popping bubbles around its edges.
- Cooling Rest: Leave the cookies on the hot baking sheet for 5 minutes after removing them from the oven. Fresh out of the oven, shortbread is fragile; carryover heat on the sheet sets the butter structure so you can transfer them to a wire rack without breaking.
Common Mistakes and How to Avoid Them
Thumbprint cookies are simple, but small technique errors can alter their appearance and texture. Here is how to keep your batch consistent.
- Scooping Flour Directly with the Measuring Cup: Dipping a measuring cup into a bag packs the flour tightly, adding up to 25 percent extra dry weight. Excess flour makes the dough dry and crumbly. Always spoon flour lightly into the measuring cup and level it off with the flat back of a knife.
- Overfilling the Jam Wells: Adding more than 1/2 teaspoon of jam into each center causes liquid to expand over the edges during baking. The runaway jam burns on the parchment paper and creates sticky, messy bottoms. Stick to 1/2 teaspoon per cookie.
- Greasing the Baking Sheet: Coating your pan with cooking spray or butter adds extra grease to the bottom of the cookies, causing them to spread out flat and thin. Line your baking sheet with parchment paper or a silicone baking mat instead.
- Using Cold, Stiff Jam: Cold jam straight from the refrigerator is tough to spoon neatly and creates uneven weight inside the well. Stir your jam in a small bowl at room temperature until smooth before filling the dough centers.
Easy Flavor and Seasonal Variations
Once you master the base dough, try these simple flavor tweaks using household pantry staples.
- Spiced Cranberry: Whisk 1/2 teaspoon of ground cinnamon into the flour. Fill the centers with thick cranberry sauce or spiced plum jam for holiday cookie trays.
- Citrus Pecan: Roll the shaped dough balls in finely chopped toasted pecans before pressing down the thumbprint. Fill the centers with lemon curd or orange marmalade.
- Chocolate Hazelnut: Omit the almond extract. Bake the cookies with empty wells. Immediately after pulling the cookies from the oven, re-press the warm centers with a spoon and fill each well with warm chocolate hazelnut spread.
- Almond Apricot: Double the almond extract to 1/2 teaspoon in the dough. Fill the wells with seedless apricot preserves and sprinkle toasted sliced almonds over the tops right after baking.
Storage, Freezing, and Make-Ahead Instructions
These cookies keep well, making them ideal for gift boxes or advance baking schedules.
Room Temperature Storage: Store cooled cookies in a single layer inside an airtight container at room temperature for up to 7 days. If you need to stack them, place a sheet of parchment paper between each layer to prevent the jam centers from sticking together.
Freezing Unbaked Dough: Shape the dough balls and press the wells, but do not add jam. Freeze the unbaked dough rounds on a parchment-lined pan for 1 hour until solid, then transfer them to a freezer-safe zip-top bag for up to 3 months. Bake directly from frozen at 350°F, adding 2 minutes to the total bake time, then fill with jam right before baking or right after pulling from the oven.
Freezing Baked Cookies: Allow baked cookies to cool completely so the jam sets fully. Freeze in an airtight container separated by parchment paper for up to 2 months. Thaw at room temperature for 20 minutes before serving.
Frequently Asked Questions
Why did my jam turn hard and rubbery after baking?
Jam becomes rubbery when it boils down too much in the oven, evaporating all its natural water content. This happens if you bake the cookies too long or use a thin jam without enough natural fruit pectin. Stick to high-pectin preserves and bake just until the cookie edges are light gold.
Can I make these thumbprint cookies without an electric mixer?
Yes, you can mix this dough entirely by hand using a sturdy wooden spoon or rubber spatula. Ensure your butter is fully softened to room temperature so it blends easily with the powdered sugar. Mix until smooth before folding in the flour.
How do I fix dough that cracks when I press my thumb into it?
Cracks mean the dough is slightly too cool or dry. Roll the dough into a ball and warm it between your hands for 5 seconds before pressing. If it still splits, work a teaspoon of softened butter into the dough bowl to restore pliability.
Should I put the jam in thumbprint cookies before or after baking?
For traditional jam thumbprints, put the jam in before baking so the fruit sets and forms a glossy finish that sticks securely to the cookie wall. For spreads like Nutella, chocolate, or lemon curd, bake the wells empty and fill them immediately after the cookies come out of the oven.
20min Buttery Jam Thumbprint Cookies
Ingredients
Equipment
Method
- Preheat your oven to 350°F (175°C) and line two large baking sheets with parchment paper.
- Place the softened butter and confectioners' sugar in a medium mixing bowl.
- Beat with an electric mixer on medium speed for 2 minutes until pale and creamy.
- Mix in the vanilla extract, almond extract, and fine sea salt until fully incorporated.
- Add the all-purpose flour and mix on low speed just until a soft dough forms.
- Scoop 1-tablespoon portions of dough and roll them into smooth balls between your palms.
- Place the dough balls 2 inches apart on the prepared baking sheets.
- Gently press your thumb or the back of a 1/2 teaspoon measuring spoon into the center of each ball to create a shallow well.
- Fill each well with 1/2 teaspoon of thick seedless jam.
- Bake at 350°F (175°C) for 10 to 12 minutes until the bottoms are pale gold and the cookie tops look set.
- Remove from the oven and let the cookies rest on the baking sheet for 5 minutes.
- Transfer the cookies to a wire rack to cool completely before serving.