Soft Homemade Dinner Rolls
The most common frustration with homemade dinner rolls is ending up with dense, dry bricks instead of soft, pillowy rolls. This happens when the yeast is killed by hot milk, or when extra flour is added during kneading out of fear of sticky dough. We solve both problems by using a warm milk mixture heated to a precise temperature and an enriched dough that relies on timed kneading rather than excess flour for structure.
The Science Behind Soft, Tender Rolls
Fat and Protein Inhibiting Gluten Development
In standard lean bread doughs, flour and water form long, strong gluten strands that create a chewy texture, similar to a crusty French baguette. For dinner rolls, we want a tender, delicate crumb. Adding butter and egg yolk introduces lipids and emulsifiers that coat the gluten proteins (glutenin and gliadin). This coating prevents the proteins from bonding too tightly, producing short gluten strands. The result is a soft, tender bite rather than a tough, rubbery chew.
Controlled Liquid Temperature and Yeast Activation
Active dry yeast requires warm liquid to break its dormant state, but temperatures above 120°F destroy the yeast cells entirely. Liquid that is too cold (below 90°F) leaves the yeast sluggish, resulting in a dense roll that refuses to rise. Warming the milk to 105°F–110°F gives yeast the ideal thermal environment to convert sugar into carbon dioxide gas efficiently. This gas creates thousands of tiny air pockets trapped inside the dough matrix.
Crowded Pan Placement for Vertical Lift
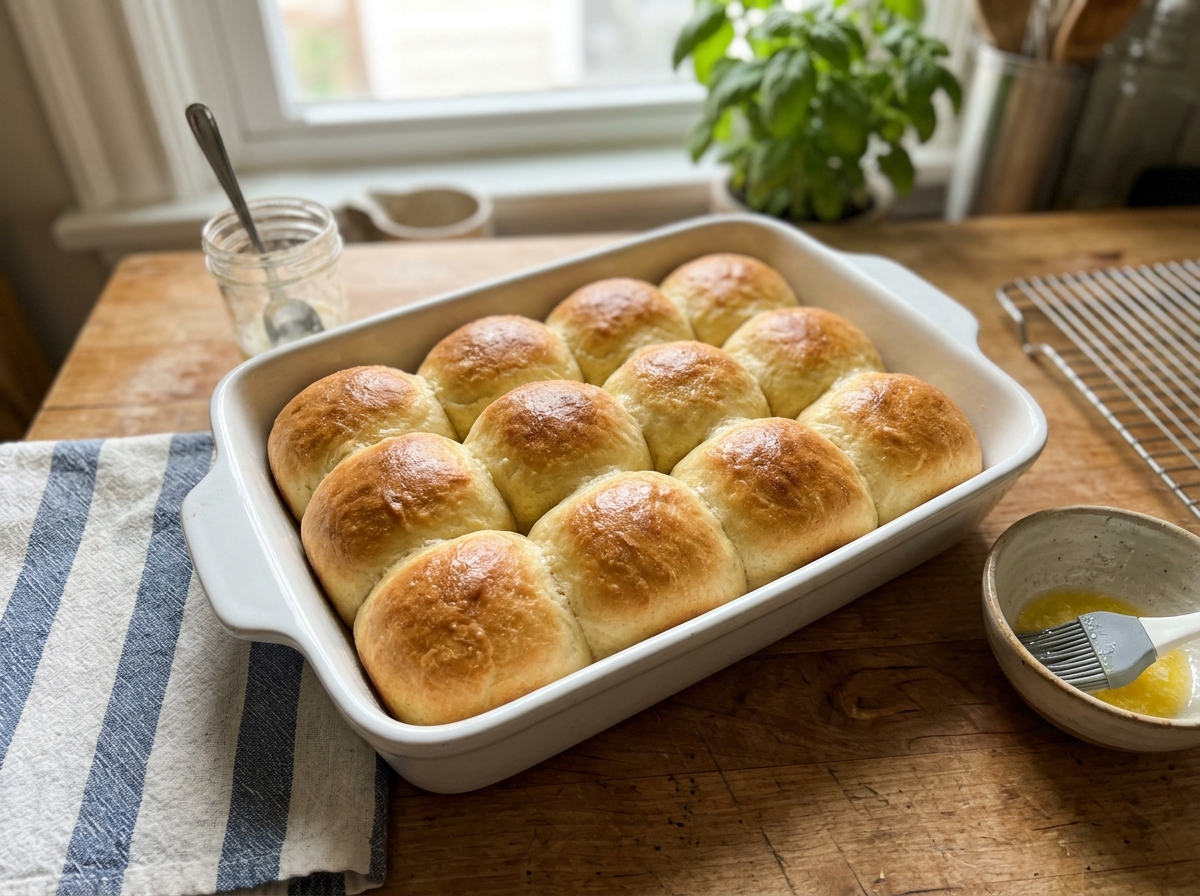
Placing twelve dough balls close together in a 9×13-inch pan forces them to push against each other as they expand during the second rise and bake. Because the rolls have nowhere to spread horizontally, they rise upward. This steam-trapping configuration keeps the sides of the rolls soft and pale while exposing only the tops to direct oven heat for uniform browning.
Key Ingredients and Smart Substitutions
- Whole Milk: The dairy fats and natural lactose in whole milk soften the crumb and promote golden browning on the crust through the Maillard reaction. Substitution: 2% milk or unsweetened soy milk can be used in equal amounts. Using plant milk or lower-fat dairy will yield a slightly drier roll with less brown crust color.
- Active Dry Yeast: Active dry yeast provides a predictable, controlled rise that builds flavor during the first proofing stage. Substitution: Instant (rapid-rise) yeast can be substituted in an equal amount (2 1/4 teaspoons). When using instant yeast, skip blooming it in warm milk and mix it directly into the dry flour.
- All-Purpose Flour: Unbleached all-purpose flour provides the perfect balance of 10% to 12% protein content, giving the rolls structure without making them heavy. Substitution: Bread flour can be substituted 1:1, but the higher protein content will make the rolls noticeably chewier rather than soft.
- Unsalted Butter: Butter adds rich flavor, inhibits excess gluten formation, and keeps the crumb moist for days. Substitution: Salted butter works equally well; simply cut the added fine salt in the recipe from 1 teaspoon down to 1/2 teaspoon to keep the overall sodium level balanced.
- Granulated Sugar: Sugar feeds the yeast to jumpstart fermentation and adds subtle sweetness to balance the yeasty flavor. Substitution: Honey or maple syrup can replace granulated sugar in a 1:1 ratio by volume. Liquid sweeteners will add a hint of floral or caramel flavor to the dough.
Step-by-Step Sensory Cues for Success
Checking Yeast Activity
After sitting in warm milk and sugar for 5 to 10 minutes, the yeast mixture should develop a thick, creamy layer of foam on top that smells distinctly yeasty, similar to warm draft beer. If the liquid remains completely flat without froth, your liquid was either too hot or your yeast packet has expired. Throw it out and start over with fresh yeast.
Judging Kneading and Gluten Formation
When kneading is complete after 6 to 8 minutes in the mixer, the dough should clear the sides of the bowl completely while clinging slightly to the bottom. Touch the dough with a dry finger; it should feel tacky but not leave raw dough sticking to your skin. Perform the windowpane test: stretch a golf ball-sized piece of dough gently between your fingers. It should stretch into a thin, translucent membrane without tearing immediately.
Testing Proofing Doneness
For the first rise, the dough should double in volume in about 60 minutes. Press two fingers 1/2 inch into the dough; if the indentation remains clearly defined without springing back immediately, the dough is fully proofed. For the second rise after shaping, the rolls should touch each other in the pan and look noticeably puffy. Gently press the side of a roll; it should spring back slowly, leaving a slight dimple.
Determining Oven Doneness
Bake the rolls at 375°F until the tops are deep golden brown, which takes 18 to 20 minutes. Tap the top of a roll near the center of the pan; it should sound hollow rather than dense or dull. For complete accuracy, insert an instant-read digital thermometer into the center of a middle roll; it should register between 190°F and 200°F. If the tops are browning too fast before the centers reach temperature, tent the pan loosely with aluminum foil for the last 5 minutes.
Common Baking Mistakes to Avoid
- Scooping Flour Directly with the Measuring Cup: Dipping a measuring cup straight into a bag of flour packs it tightly, adding up to 25% extra flour by weight. Excess flour absorbs all the moisture in the dough, resulting in dry, heavy rolls. Always scoop flour into your measuring cup with a spoon and level it off with a straight edge, or better yet, use a digital scale to measure 390 grams.
- Overheating the Milk Liquid: Heating milk in the microwave without checking the temperature with a thermometer often pushes the liquid past 120°F, which thermal-shock kills the active yeast. Always use an instant-read thermometer to verify the milk is between 105°F and 110°F before whisking in the yeast.
- Adding Too Much Flour During Kneading: Soft dough can feel sticky during the first few minutes of mixing, leading cooks to pour in extra flour. Adding extra flour destroys the delicate hydration ratio. Allow the mixer to knead for at least 5 minutes before adding flour; gluten development naturally turns sticky dough into a smooth, elastic ball.
- Under-Proofing the Second Rise: Rushing the rolls into the oven right after shaping yields small, dense rolls with thick crusts. Allow the shaped rolls to rise in the pan until they expand into one another and feel pillowy soft to the touch.
- Skipping the Post-Bake Butter Brush: When rolls come out of the dry heat of the oven, their top crust is firm and crisp. Brushing melted butter onto the tops within 60 seconds of removal locks in moisture and softens the top crust into a tender layer.
Flavor and Dietary Variations
Garlic Herb Dinner Rolls
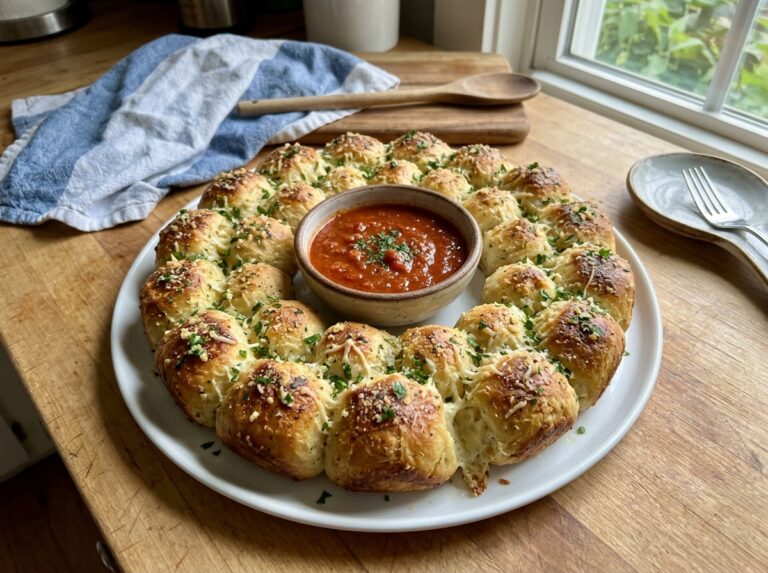
Add 1 teaspoon of garlic powder and 1 tablespoon of finely chopped fresh herbs (such as rosemary, thyme, or parsley) directly into the flour mixture before kneading. After baking, brush the hot rolls with 2 tablespoons of melted butter mixed with 1 minced garlic clove and 1 tablespoon of freshly chopped parsley.
Honey Butter Glazed Rolls
Replace the 2 tablespoons of granulated sugar in the dough with 2 tablespoons of wildflower honey. After baking, melt 2 tablespoons of butter with 1 tablespoon of honey and brush this sweet glaze over the warm rolls for a shiny, golden finish.
Cinnamon Sugar Rolls
Shape the dough into rolls as directed. Before baking, brush the tops with 1 tablespoon of melted butter and sprinkle generously with a mixture of 2 tablespoons granulated sugar and 1 teaspoon ground cinnamon. Bake as directed for a sweet, spiced roll perfect for breakfast or dinner.
Storage, Reheating, and Make-Ahead Instructions
Room Temperature Storage
Allow baked rolls to cool completely to room temperature on a wire rack. Store them in an airtight plastic bag or container at room temperature for up to 3 days. Do not store baked rolls in the refrigerator, as cold temperatures accelerate starch retrogradation, making bread stale faster.
Freezing Baked Rolls
Cool the baked rolls completely. Wrap the entire batch tightly in aluminum foil, then place the wrapped rolls inside a heavy-duty freezer bag. Freeze for up to 3 months. Thaw frozen rolls at room temperature overnight while still inside the bag to allow moisture to reabsorb into the crumb.
Overnight Make-Ahead Method
To prepare rolls ahead of time, assemble and shape the dough balls in the baking dish as instructed. Immediately cover the pan tightly with plastic wrap and place it in the refrigerator overnight for up to 15 hours. The cold temperature slows down yeast fermentation. The next day, remove the pan from the refrigerator and let the rolls sit at room temperature for 45 to 60 minutes to complete their second rise before baking as directed.
Best Reheating Methods
To serve warm rolls, preheat your oven to 350°F. Place the rolls on a baking sheet, cover tightly with aluminum foil to prevent drying out, and heat for 7 to 10 minutes until warm through the center. For individual rolls, wrap a roll in a damp paper towel and microwave on medium power (50%) for 12 to 15 seconds.
Frequently Asked Questions
Can I make these dinner rolls without a stand mixer?
Yes, you can knead the dough by hand. After combining the liquid and dry ingredients in a large mixing bowl, turn the dough out onto a lightly floured surface and knead manually for 8 to 10 minutes until smooth and elastic.
Why didn’t my dinner rolls rise during the first proofing step?
The main causes of dough failing to rise are liquid that was too hot (above 120°F), expired yeast, or a cold kitchen environment. Ensure your milk is 105°F–110°F, check the expiration date on your yeast, and place the covered bowl in a warm draft-free location like an unheated oven with the light turned on.
How do I keep my dinner rolls soft after they cool?
Store cooled rolls in an airtight plastic container or zipper-top bag at room temperature. Brushing the rolls with melted butter immediately after taking them out of the oven also helps seal in moisture and keeps the crust soft.
Can I freeze unbaked dinner rolls to bake later?
Yes, shape the dough into balls and place them on a parchment-lined baking sheet. Freeze until solid for about 2 hours, then transfer the frozen dough balls to a freezer bag for up to 1 month. When ready to bake, place frozen dough balls in a greased pan, cover loosely, and let rise at room temperature for 4 to 5 hours before baking.
Soft Homemade Dinner Rolls
Ingredients
Equipment
Method
- In a glass measuring cup or small bowl, heat 3/4 cup whole milk until it reaches between 105°F and 110°F.
- Whisk 2 tablespoons granulated sugar and 1 packet active dry yeast into the warm milk, then let stand for 5 to 10 minutes until foamy.
- In the bowl of a stand mixer fitted with a dough hook, whisk together the foamy yeast mixture, 1 room-temperature egg, and 4 tablespoons of melted unsalted butter.
- Add 3 cups of the all-purpose flour and 1 teaspoon of fine salt to the liquid ingredients.
- Mix on low speed for 1 minute to incorporate the flour, then increase speed to medium-low and knead for 6 minutes.
- Add the remaining 1/4 cup of flour 1 tablespoon at a time if the dough clings excessively to the sides of the bowl, kneading until the dough forms a smooth, elastic ball.
- Transfer the dough to a lightly oiled large bowl, cover tightly with plastic wrap, and let rise in a warm, draft-free spot for 60 minutes or until doubled in volume.
- Lightly grease a 9x13-inch baking dish with butter or nonstick cooking spray.
- Punch down the dough gently, transfer to a clean surface, and divide into 12 equal portions weighing roughly 60 grams each.
- Shape each portion into a smooth ball by pulling the top surface tight and pinching the seam on the bottom.
- Arrange the 12 dough balls in 3 rows of 4 in the prepared baking dish.
- Cover the dish loosely with a clean kitchen towel and let proof for 30 minutes until puffy and touching.
- Preheat your oven to 375°F (190°C) during the last 15 minutes of the second rise.
- Bake for 18 to 20 minutes until the tops are golden brown and the internal temperature reaches 190°F on an instant-read thermometer.
- Remove from the oven and immediately brush the hot tops with the remaining 2 tablespoons of melted butter.